How to install solar tiles on a roof?
Apr 13, 2026
L
Luke
Product Manager, GreenMore · Photovoltaic building materials
As more households and businesses look for long‑term energy independence, solar roof tiles are becoming a realistic alternative to traditional photovoltaic panels. They are not only a power‑generation component but also part of the building itself. For a company like GreenMore, which focuses on residential and commercial BIPV roofing materials and supporting energy systems, installation quality is just as important as product performance. A well‑designed system starts on the roof, long before the first kilowatt‑hour is produced.
This article summarizes the full installation process of solar roof tiles from a manufacturer's perspective. It is written for homeowners, installers, and project developers who want a clear understanding of how a solar roof tile system is planned, installed, and integrated with an energy storage system.
Why Solar Roof Tiles Are Gaining Attention
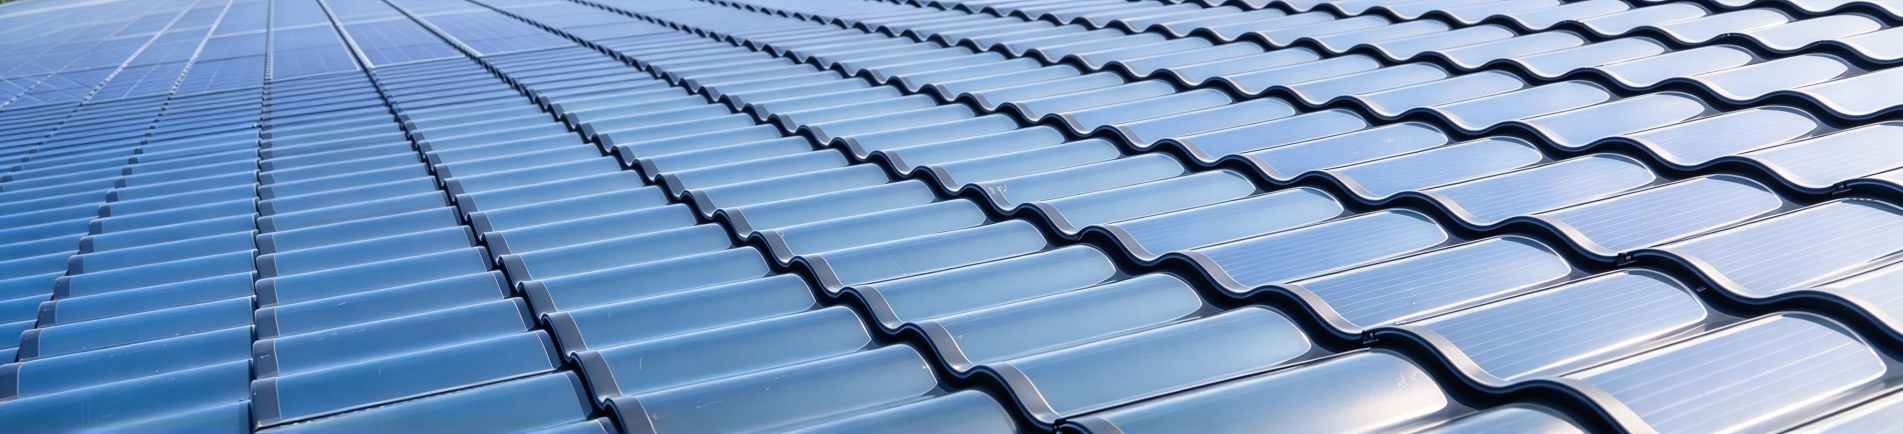
Solar roof tiles are often compared with conventional solar panels, but the two products serve different purposes. Tiles are designed to merge with the building envelope, which makes them suitable for projects where appearance matters as much as performance. Many high‑quality tiles use reinforced laminated glass and integrated PV cells, giving them durable weather resistance and a long service life.
According to the International Energy Agency (IEA), rooftop solar has been one of the fastest‑growing segments of renewable energy in recent years. This trend is especially strong in regions where BIPV systems are preferred for architectural integration.
While the upfront cost is higher than conventional rack‑mounted panels, the long‑term value can be competitive when the system is designed correctly. For homeowners who want a clean roofline or for commercial buildings with strict architectural requirements, solar roof tiles offer a practical balance between aesthetics and energy production.
Step 1: Roof Assessment and System Planning
Every successful installation begins with a detailed evaluation of the roof. In practice, this step determines how much energy the system can produce and whether the structure can support the tiles.
Structural inspection — verify that the roof can bear the tile load (approximately 21–22 kg/㎡ for GreenMore three‑curve tiles).
Orientation and tilt — south‑facing roofs with a tilt matching the local latitude produce the most energy.
Shading analysis — chimneys, dormers, and nearby trees should be assessed to minimize output losses.
Energy demand review — understand the household or building load profile to size the array and storage correctly.
These early decisions shape the final system size, inverter configuration, and whether an energy storage system will be part of the setup.
Roof orientation and shading can influence annual solar output significantly, making the planning stage one of the most critical parts of the entire project. If you want to explore system sizing options, you can refer to GreenMore's solar power system overview.
GreenMore solar tile installation structure cross-section
Step 2: Installation of Solar Roof Tiles
Installing solar tiles is more detailed than laying standard PV modules. The process usually includes:
Roof preparation and waterproofing — install a waterproof underlay on the prepared roof deck.
Mounting structure setup — fix battens or rails according to the tile layout plan.
Tile placement and electrical connection — lay tiles from the eaves upward, interlocking side edges and overlapping the course above by 85 mm. Connect MC4 cables as the work progresses.
Inverter and storage integration — wire the tile strings to the hybrid inverter and connect the battery system.
When paired with a LiFePO₄ battery storage system, the home can use solar power during the day and stored energy at night or during outages.
Residential and commercial battery installations have been growing rapidly worldwide, reflecting the increasing importance of storage in solar installations. If your project requires a compatible inverter, GreenMore offers several hybrid inverter solutions.
Step 3: System Testing, Grid Connection, and Handover
Once installation is complete, the system goes through several checks:
Electrical testing — verify open‑circuit voltage, insulation resistance, and earth continuity.
Commissioning and monitoring setup — configure the inverter and connect to the monitoring platform.
Grid‑connection application — submit the required paperwork to the local distribution network operator.
User training — walk the homeowner or facility manager through basic operation and monitoring.
A well‑installed system should operate quietly in the background, providing stable power and clear data through the monitoring platform.
Technical Recommendations for Different Roof Types
Different roof structures require different installation methods, cable specifications, and inverter configurations. The table below summarizes the recommended parameters based on GreenMore's engineering data for solar roof tile installations.
Parameter
Metal Roof (Commercial)
Concrete Roof (Flat)
Tile / Sloped Roof (Residential)
Recommended Installation Method
Clamp‑based (no drilling)
Ballast / counterweight
Hook‑based / penetration
Optimal Tilt Angle
5°–10°
15°–30°
Follow slope or tilt brackets
Cable Specification
YJV 4×70 + 1×35
YJV 5×6 mm²
PV1‑F 4 mm²
Inverter Configuration
10 kW–50 kW string inverter
5 kW–10 kW hybrid inverter
3 kW–6 kW single/three‑phase
Estimated Annual Yield
1100–1300 kWh/kW
1000–1200 kWh/kW
950–1150 kWh/kW
Updated on September 28, 2026
Commercial users can explore GreenMore's industrial solar and storage solutions for large‑scale applications, while homeowners may prefer our residential solar systems.
Frequently Asked Questions
Do solar tiles work on cloudy days?
Yes. Output decreases, but modern PV cells still generate power from diffused light. Pairing the system with backup power solutions ensures a stable supply even when generation is reduced.
How long does installation take?
A typical residential project takes 3–5 days, depending on roof complexity and system size.
Are solar tiles suitable for commercial buildings?
They can be. For large factory roofs, combining solar tiles with commercial energy storage can significantly reduce peak electricity costs.
Do solar roof tiles require more maintenance than traditional solar panels?
Not really. Most solar roof tiles are designed to function as both roofing material and power‑generating components, so routine cleaning and occasional inspections are usually enough.
How long do solar roof tiles typically last?
GreenMore solar tiles carry a 25‑year linear power warranty and a 10‑year product warranty. The laminated tempered glass construction is designed to withstand decades of weather exposure, and individual tiles can be replaced if damaged.
Can solar roof tiles be installed on an existing roof?
Yes, but it depends on the roof condition. Older roofs may require partial or full replacement before installation. GreenMore tiles are designed to install like conventional roof tiles — no extra mounting frames over the existing roof.
Are solar roof tiles compatible with home battery systems?
Yes. Solar roof tiles work with most hybrid inverters and LiFePO₄ home battery systems, allowing homeowners to store excess energy for nighttime use or outages.
How much electricity can a solar roof tile system generate per square meter?
It depends on the tile type. GreenMore CIGS thin‑film tiles produce about 100–105 W/㎡, while BC back‑contact tiles reach up to 24.1% module efficiency. Flat tiles can achieve even higher power density at around 170–200 W/㎡.
Do solar roof tiles increase home value?
In many markets, yes. Homes with integrated solar systems often see higher resale value due to lower electricity costs and improved aesthetics.
Are solar roof tiles suitable for cold or snowy climates?
They are. Many tiles use tempered glass and have strong load‑bearing capacity (5400 Pa for GreenMore tiles). Snow usually slides off the smooth glass surface more easily than on traditional roofing materials.
What happens if one tile gets damaged?
Most systems allow individual tiles to be replaced without removing the entire array. Installers can disconnect and swap the damaged tile while keeping the rest of the system operational.
Can solar roof tiles work during a power outage?
Only if paired with a hybrid inverter and battery storage system. Grid‑tied systems without storage shut down automatically during outages for safety reasons.
How long does it take to recover the investment?
Payback periods vary by region, electricity prices, system size, and available incentives. A proper feasibility study based on local conditions is the best way to estimate the return on investment.
Work With GreenMore
GreenMore is a photovoltaic tile manufacturer. Our three‑curve solar tiles, photovoltaic bricks, and photovoltaic curtain walls are produced in-house, in CIGS thin‑film and back‑contact technologies, with the inverter and battery supplied as supporting components of the complete system.
If you are planning a solar roof tile project or exploring energy storage solutions, GreenMore provides complete support from system design to installation guidance. You can reach us through our contact page or email export@gmsolarkit.com.
L
Luke · Product Manager, GreenMore
Luke manages GreenMore's photovoltaic building-material range, from the CIGS thin-film triple-arch tile to the newer back-contact line. In the solar industry since 2017, he focuses on designs that are genuinely buildable, with honest specs and warranty terms that match the products actually shipped.






 Network Supported


