GreenMore’s Fast‑Install Solar Tile System
Jul 28, 2026
A tiled BIPV roof is usually quoted in square metres and installed in days, and the gap between those two numbers is where the cost sits. On most projects the product is not the problem. The problem is that the installation still assumes a crew of three, a rail system and an electrician with a crimping tool, and none of that scales down to a 60 m² residential roof.
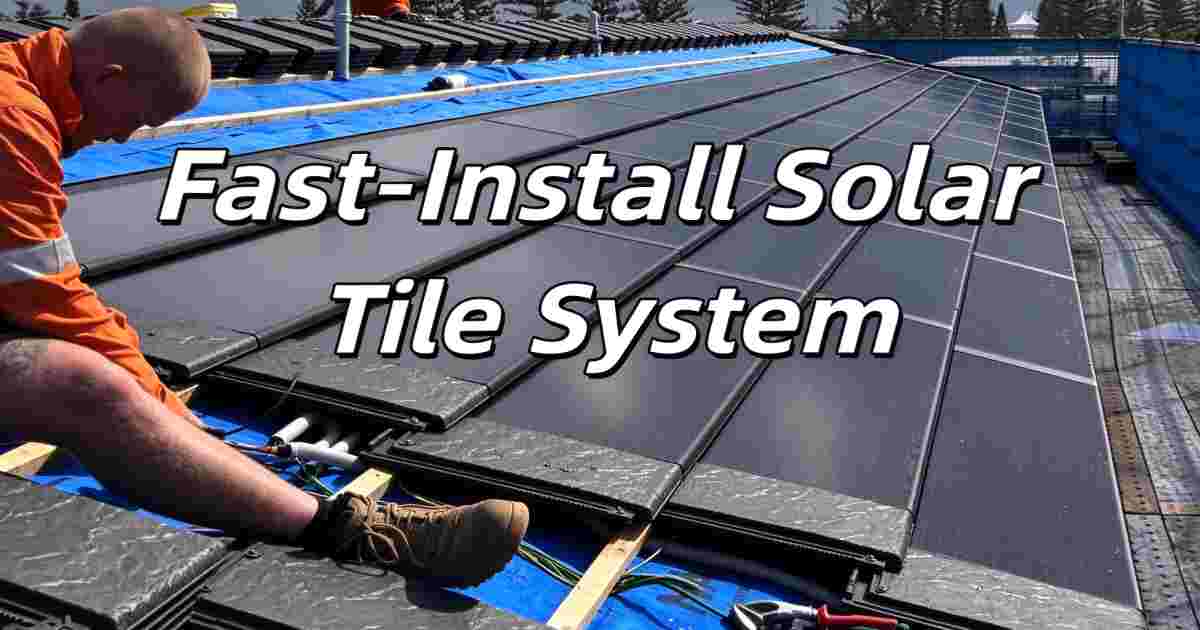
GreenMore builds solar tiles around a different assumption: one qualified installer, working alone, should be able to carry a tile up a ladder, seat it, lock it, and move on. This page covers how that works in practice, what the resulting installation rate is, and where the approach stops making sense.
The numbers below are measured on the tile body itself, not on a whole system. Roof preparation, electrical design and inspection are separate line items and are treated separately. The product range itself is on the solar tile category page.
The system arrives as tiles, connectors and edge pieces. There is no rail package in the delivery.
Why a tiled BIPV roof is slow to install
The delays are structural rather than a matter of crew skill. Three of them account for most of the lost time on a small project.
Three people on a roof instead of one
A conventional framed module in the 400 W class weighs roughly 20 to 30 kg, and the frame makes it awkward to carry on a ladder. Getting one onto a pitched roof, holding it while the bracket is set and tightening four bolts is not work one person can do safely at height. So the crew size is set by the weight and the shape of the object, not by the amount of work.
That has a knock-on effect. A three-person crew needs three sets of fall protection, three people available on the same day, and a schedule that survives one of them being ill. On a small roof the mobilisation cost can exceed the labour actually performed.
Racking is a second roof
Before a single module goes up, the rail system has to be set out, drilled, anchored, levelled, checked for corrosion protection at every cut, and earthed. That work happens at height, over the waterproofing, and it is done by the same people who will then install the modules. A rail layout on a complex roof geometry can absorb a full day before any generating capacity exists.
Racking also creates the interface where most roof leaks originate. Every penetration is a potential failure point, and each one has to be flashed, sealed and inspected.
DC wiring is electrician work, not roofing work
On a string system, someone has to strip and crimp every connector, run the strings to a combiner box, and land them. That is licensed work in most markets, which means the roofing crew and the electrician have to be on site at the same time or the job runs twice. On a residential project that coordination is often the longest lead item in the whole schedule.
One installer, one tile, no rail. The interlock sets the alignment instead of a measured layout.
What changed at the system level
Removing the crew requirement meant changing four things at once. Any one of them alone would not have been enough.
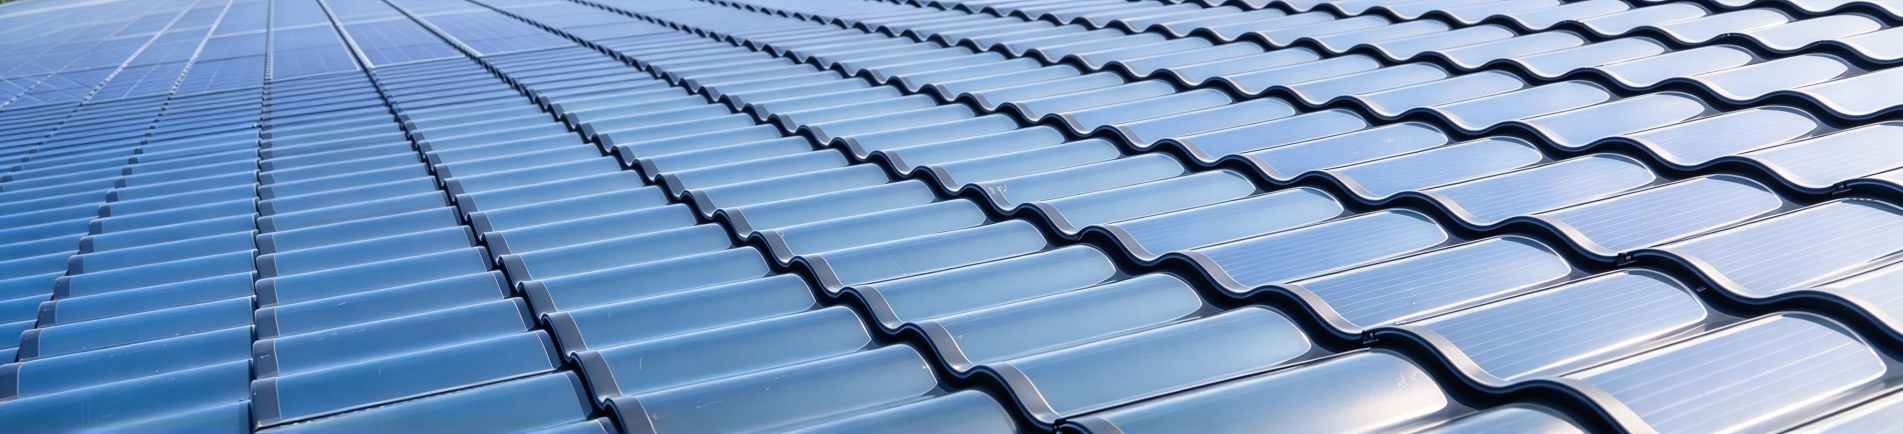
A 6.5 kg tile body
The BC curved tile weighs 6.5 kg on a 720 × 500 × 32 mm body. The triple-arch tile is 6.5 kg at 700 × 500 × 33 mm. The flat tile is 8.9 kg at 1060 × 650 × 35 mm, and the long-span strip is 9.6 kg at 1732 × 418.5 mm. Every one of those can be carried up a ladder in one hand and seated with two.
The weight comes from a dual-glass sandwich on a composite back shell rather than a framed aluminium module. Both faces are tempered glass, which is also why the tile can be walked on during installation and maintenance without a walkway.
The interlock replaces the rail
There is no rail. Tiles overlap vertically and lock together with horizontal male-female joints, so each tile is positioned by the one before it rather than by a measured layout. Only the first tile and the edge tiles take fasteners. The finished surface behaves as one rigid layer rather than a set of individually clamped panels.
Because the interlock carries the alignment, the skill requirement shifts. An installer does not need to set out a rail grid or read a spacing drawing. They need to seat a joint correctly, which is a tactile check rather than a measurement.
Connectors arrive terminated
Each tile leaves the factory with its leads already fitted with IP68 connectors and an anti-misplug key. There is no stripping, no crimping and no polarity decision on the roof. The electrical work reduces to plugging adjacent tiles together and bringing one pair of leads down to the inverter.
On the BC and flat ranges the junction box is IP68 rated with MC4 connectors. The triple-arch and long-span tiles use an IP67 junction box with IP68 connectors, which is the correct rating for a sealed enclosure that is not continuously submerged but is exposed to driven rain.
One layer does two jobs
Moulded drainage channels and sealing strips are part of the tile. Roofing, waterproofing and generation go down in the same pass, so there is no separate membrane to install underneath and no membrane to disturb later. On a retrofit this is the difference between a roofing project and a construction project.
The installation sequence
This is the sequence for a pitched roof where the substrate, battens and purlins are already in place and the electrical design is signed off. It is the same for all four profiles.
Step 1 - Setting out
Clean the surface, check batten spacing and purlin condition, and fix the first reference tile. That tile sets the line for the whole field, so it is checked with a level and a string before anything else goes down. A continuity check on the first tile confirms the leads are sound before the field is built on top of it.
Step 2 - Laying the field
Each tile drops onto the vertical lap of the one below, the horizontal interlock closes, and fasteners go in only where the design calls for them. Alignment follows the previous tile. The installer works up the slope in courses, which keeps the working position stable and the fall-protection anchor in one place.
Step 3 - Inspection and connection
Confirm every lock is seated by walking the field and checking the joints, verify the fastening points at edges and ridges, plug the string leads through to the inverter, and commission. On a straightforward roof this stage is short; on a roof with multiple planes and penetrations it is where the time goes.
Stage
Work involved
Time
Setting out
Surface check, reference tile, continuity test
20–40 minutes
Laying the field
Interlocking and fastening, per tile
4–6 minutes per tile
Inspection and connection
Joint check, edge fasteners, string connection, commissioning
1–3 hours depending on roof complexity
The middle row is the one that matters, and it is the one that is easiest to quote against, because it scales linearly with roof area.
The finished surface is a roof. There is no second layer of equipment sitting on top of it.
What the installation rate works out to
One installer, on a prepared roof, lays 10 to 15 tiles an hour. That figure holds across the range, because the constraint is the handling and seating motion rather than the tile size. Converting it to area depends on the body dimensions.
Profile
Body size
Area per tile
Tiles per hour
Area per hour
BC curved tile
720 × 500 mm
0.36 m²
10–15
3.6–5.4 m²
Triple-arch tile
700 × 500 mm
0.35 m²
10–15
3.5–5.3 m²
Flat tile
1060 × 650 mm
0.69 m²
10–15
6.9–10.3 m²
Long-span strip
1732 × 419 mm
0.73 m²
10–15
7.3–10.9 m²
Smaller tiles mean more joints and more handling per square metre. That is the trade-off against appearance: the 720 × 500 body gives the curved, tiled look that suits a pitched residential roof, and it costs more labour per square metre than the long-span strip that suits a large industrial slope.
What that means for a roof
The table below uses the BC curved tile and six productive hours a day, which is realistic once access, breaks and inspection are accounted for.
Roof area
Tiles required
Installer hours
Working days
50 m²
139
9–14
1.5–2.5
100 m²
278
19–28
3–5
200 m²
556
37–56
6–9
500 m²
1,389
93–139
15–23
These are installation hours for the tile layer only. They exclude roof preparation, scaffolding, electrical design and inspection, all of which are project-specific. They also assume a simple roof form.
Where the rate drops
Four conditions reliably slow the work, and they should be priced in rather than discovered:
Hips, valleys and penetrations. Every cut tile is a fitting operation rather than a laying operation. A roof with four valleys will not run at the flat-field rate.
Multiple planes. Each plane needs its own setting-out and its own edge fastening, and the installer moves scaffolding between them.
Height and access. Carrying tiles up a ladder to a second storey is slower than working from a scaffold at eaves level, and the 6.5 kg body does not change the vertical distance.
Wind. Above roughly 40 km/h most crews stop laying glass on a pitched roof. That is a schedule risk in coastal and winter conditions, not a product issue.
Wind and water: what the ratings mean
Converting 5,400 Pa to a wind speed
All four profiles are rated at 5,400 Pa front-side static load, with 2,400 Pa on the back face for the flat tile. That is a pressure figure, not a wind speed, and the conversion is worth showing because the two are often confused.
Wind pressure follows q = 0.5 x air density x velocity squared. At standard air density of 1.225 kg/m³, 5,400 Pa corresponds to a wind speed of about 338 km/h if the full load were applied as wind pressure. It never is, for two reasons: the IEC test applies a safety factor of 1.5 on top of the design load, and wind on a pitched roof acts as suction concentrated at edges and ridges rather than as a uniform pressure.
Applying the 1.5 safety factor brings the equivalent to roughly 276 km/h. Applying a further edge-zone suction factor of 1.5 brings it to roughly 225 km/h. So the conservative public figure we use is a design wind speed of no less than 200 km/h, and we would rather understate it than publish a number that a structural engineer has to argue with.
What matters for a project is that the figure is a tested static load under IEC 61215, not a calculated estimate, and that the interlock transfers the load across the whole field rather than concentrating it at clamp points.
Water goes down, not sideways
Each tile carries moulded drainage channels and a sealing strip at the lap. Water that gets past the horizontal joint is channelled down the vertical lap to the course below rather than sitting in a tray. The tile has no open cavity where water can pool, which is the failure mode on a framed module with a rail underneath it.
The junction box sits on the underside of the lap, protected by the tile above. That is the same detail a clay plain tile uses, and it is why the electrical enclosure can hold IP67 rather than needing a higher rating.
Hail
The triple-arch tile is tested against 25 mm hailstones at 23 m/s, which is the IEC 61215 hail impact sequence. The dual-glass construction on the BC and flat ranges provides the same physical protection: tempered glass on both faces with no exposed backsheet to puncture.
Four profiles, one fitting logic
The range covers four roof conditions, and all four install with the same motion. That matters for a contractor because it means one training session covers the product line.
BC curved tile. 37, 42 and 50 W on a 720 × 500 × 32 mm body at 6.5 kg, up to 24.1% module efficiency. The default choice for pitched residential roofs where the finished surface has to read as a tiled roof. Four standard colours: grey, green, red and black.
Triple-arch tile. 32 W at 6.5 kg on a 700 × 500 × 33 mm body, with the three-curve profile used on Chinese-style and architect-led roofs where the silhouette is part of the brief.
Flat tile. 104 and 110 W at 8.9 kg on a 1060 × 650 × 35 mm body, flush-mounted for commercial and industrial slopes and for slate-format residential roofs.
Long-span strip. 109, 112 and 115 W at 9.6 kg on a 1732 × 418.5 mm body, for large roof planes where coverage per hour matters more than tile-scale appearance.
The fitting logic is identical: lap, lock, fasten where required, plug in. What changes is the area covered per hour and the visual result.
What this changes commercially
For EPC contractors
The constraint on small BIPV work is not demand, it is that a three-person crew plus an electrician cannot be justified on a 60 m² roof. If one trained installer can cover the tile layer, projects below roughly 150 m² become worth quoting. That is a market access change rather than a cost saving.
It also changes who you can send. A single installer with tile experience can be trained on the product in a day, which means labour does not have to be held in reserve for the few jobs that need a full crew.
For distributors
A product that needs a specialist crew is hard to move through a distribution channel, because the buyer has to solve the installation problem before they can buy. A product that a local roofer can install removes that objection. The distributor programme covers territory terms; the technical point is that installation training is a day, not a course.
For the building owner
Labour is the part of a BIPV quote that is hardest to justify and easiest to cut. Removing the rail package removes both a material line and the days spent installing it. The finished roof also looks like a roof, which matters on any building where the solar is not supposed to be the visual subject.
What the system does not solve
Being specific about the limits is more useful than another list of advantages.
Roof structure still has to be right. The tile is light, but it is glass, and it needs a substrate that is flat, dry and correctly battened. A failing roof deck is not fixed by a lighter tile.
Electrical design still has to be done. String layout, inverter selection and grid compliance are project engineering. Pre-terminated connectors remove site labour, not design work.
Inspection still has to happen. A fast install is only an advantage if it is checked. The joint check in step 3 is not optional, and a skipped inspection on a 200 m² roof is a warranty problem waiting to surface.
Not every roof suits a tile. Very low slopes, heavy snow loads and complex industrial geometries may be better served by the long-span strip or by a conventional system. We would rather say so at quotation stage.
For a project-specific configuration rather than a standard roof, see the customization process. For the certification picture across markets, see the full-chain customization guide. For sample and approval procedure before a project order, see how sample customization works.
Frequently asked questions
How long does it take to install a solar tile roof?
On a prepared roof, one installer lays 10 to 15 tiles an hour, which is 3.6 to 5.4 m² per hour with the 720 × 500 BC tile. A 100 m² roof works out at 19 to 28 installer hours, or three to five working days at six productive hours a day. Roof preparation, scaffolding and electrical design are additional and vary by project.
How much does a solar tile weigh?
The BC curved tile and the triple-arch tile are both 6.5 kg. The flat tile is 8.9 kg and the long-span strip is 9.6 kg. All four can be carried up a ladder and seated by one person, which is the point of the body design.
Do solar tiles need racking?
No. The tiles interlock directly onto the roof structure, with fasteners only at the first tile and the edges. Removing the rail package removes both the material cost and the day of setting out, drilling and levelling that a rail layout requires.
Can one person install a solar tile roof?
One person can install the tile layer. They cannot do the electrical design, the grid connection sign-off or the roof preparation alone, and local rules on licensed electrical work still apply. The claim is about the roofing labour, not the whole project.
What wind speed are the tiles rated for?
5,400 Pa front-side static load under IEC 61215, which is the tested figure. Converting that conservatively, allowing for the 1.5 safety factor in the test and for edge-zone suction on a pitched roof, gives an equivalent design wind speed of no less than 200 km/h. We publish the tested pressure rather than a headline speed because the pressure is the number an engineer can check.
Are the tiles waterproof without a membrane underneath?
The tile carries moulded drainage channels and a sealing strip at the lap, and the junction box sits under the lap of the tile above. On a new roof that replaces the covering and the waterproof layer in one pass. On a retrofit over an existing sound roof, the existing covering is normally removed first, because two layers trap water rather than shed it.
L
Luke
Product Manager, Solar Roof Tiles
Works with EPC partners and distributors on installation design, certification and project delivery.
Updated on November 14, 2026





 Network Supported


