Seamless Solar Tiles: Roofing and Power Generation in One
Nov 13, 2026
Most rooftop solar is added to a building. A seamless solar tile is part of the building. The tile that keeps the rain out is the same tile that generates the electricity, and there is no second layer sitting on top of it.
That distinction sounds small until you stand in front of the house. Rack-mounted panels announce themselves from the street: rails, standoffs, visible frames, a stepped silhouette against the sky. Tiles do not. From ten metres away, a well-installed solar tile roof reads as a roof, and most visitors will not notice anything unusual until they look closely at the surface.
This article covers what "seamless" means in structural terms rather than marketing terms, the specifications that decide whether a tile roof actually performs, and the cases where the approach stops making sense.
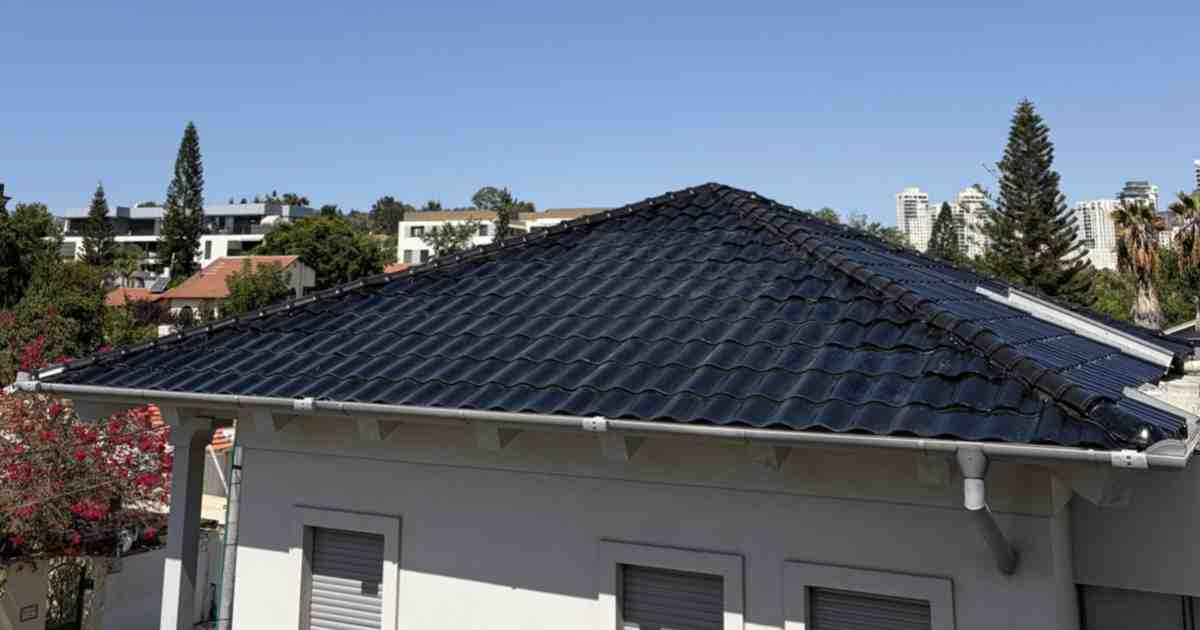
A full curved-tile roof from street level. The array is the roof surface, not an addition to it.
What "seamless" actually means in a solar tile
A conventional rooftop array is a three-layer assembly. The roof structure carries the load, a waterproof membrane keeps water out, and the panels sit above both on aluminium rails. Each layer has its own installer, its own warranty and its own failure mode.
A solar tile collapses those three layers into one product. The tile is the weather barrier. The tile is the structural covering. The tile is the generator. There is no membrane underneath the array and no rail above it, which is why the surface stays flat.
This is what building-integrated photovoltaics means in practice. BIPV is not a panel that has been made to look nicer. It is a building component that happens to produce electricity. That is the same line IEA PVPS Task 15 draws when it separates BIPV from BAPV, or building-applied photovoltaics.
The difference from rack-mounted panels
Seamless solar tiles
Rack-mounted panels
Layers on the roof
One
Three: structure, waterproofing, PV
Roof penetrations
None beyond standard tile fixing
Rails anchored through the waterproofing
Visual profile
Flush with the roof plane
Raised above the roof surface
Replacement cycle
Roof and PV age together
Roof may need redoing underneath the array
Best suited to
New roofs and full re-roofs
Sound existing roofs, flat roofs
Why the roofline matters more than most buyers expect
Aesthetics is usually framed as a personal preference, which undersells the problem. On a lot of projects the roofline is a planning constraint.
In historic quarters across southern Europe, roof replacements in protected zones are reviewed against the surrounding streetscape. In Mediterranean villa developments, the roof is the most visible elevation from the road and from neighbouring properties. Homeowners' associations in the United States routinely reject visible arrays on street-facing slopes. In all three cases, the objection is not that solar looks bad. It is that the roof no longer matches what the building was designed to be.
A tile that matches the profile, the colour and the reflectivity of the original covering solves a problem that a more efficient panel does not. That is the trade a BIPV roof makes, and it is worth being clear about it: you are choosing architectural continuity over the last few percent of conversion efficiency.
How the tile becomes the roof
"It replaces your roof tiles" is easy to claim and harder to engineer. Three things have to be true at once: water has to leave the roof, the tile has to carry load, and the electrical parts have to survive twenty-five years of the same weather the roof does.
Interlocking and drainage
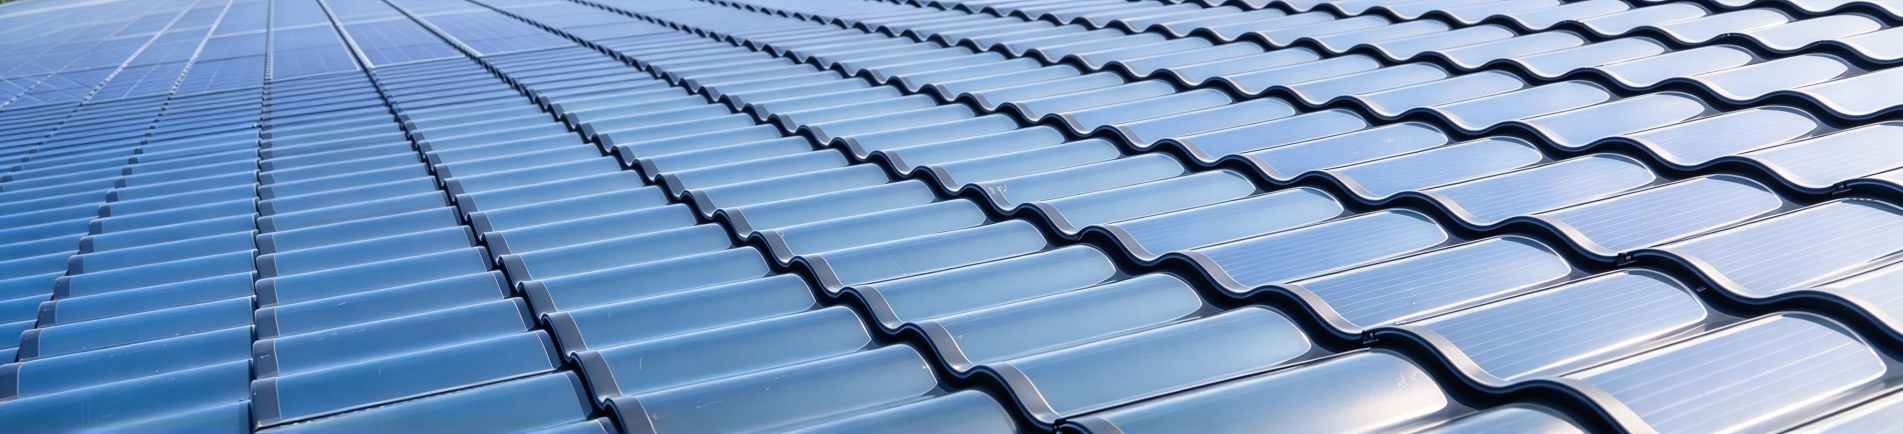
GreenMore tiles connect through sealed interlocking channels rather than a separate underlay. The curved profile on the curved BC tile sheds water the way a traditional clay tile does, which also means less dust accumulation than a flat panel and fewer cleaning cycles over the year.
The triple-arch tile uses a stacked interlocking profile with built-in windproof hooks and an integrated drainage path, so the water management is part of the tile geometry instead of an added membrane. The tile-strip system goes further, laying long strips across the roof with a bottom cement tile course and a dedicated ridge detail, which is closer to how a metal standing-seam roof is built than to how a panel array is built.
Side lap channel, interlocking tooth and sealing strip on the triple-arch tile: water is managed by the profile, not by a membrane underneath.
Double-glass construction
GreenMore tiles use tempered photovoltaic glass on both the front and the back. There is no polymer backsheet anywhere in the assembly.
This matters more than it sounds. A conventional module sandwiches its cells between front glass and a plastic backsheet. The backsheet is the part that fails first in hot, humid and high-UV conditions: it yellows, it cracks, and eventually it delaminates from the encapsulant. A glass-to-glass assembly removes that failure path entirely, at the cost of extra weight. On a 720 × 500 mm tile the penalty is 6.5 kg, which is well within the range a tiled roof already carries. We covered the durability comparison in more detail in this comparison of double-glass and conventional modules.
What the load figures mean
The headline number on every GreenMore tile datasheet is 5400 Pa of front static load. That is roughly 550 kg per square metre, applied evenly across the surface. It is the figure that decides whether a roof survives a design snow load or a storm event, and it is tested to the same protocol that a conventional module is tested to. We walk through how that test is actually run in this breakdown of the 5400 Pa rating.
The triple-arch tile adds two figures that matter in hail country: impact resistance to 25 mm hailstones at 23 m/s, and an operating range of −40 °C to +85 °C. For reference, 25 mm is just under an inch across, and 23 m/s is close to the terminal velocity a stone that size reaches falling from a severe storm cell.
One figure that is frequently misread is the IP rating. When a datasheet says IP68, it refers to the junction box and the connectors, not to the whole tile. The tile itself is waterproof by geometry, through interlocking and drainage. The IP rating covers the point where the electricity enters and leaves, which is the part that actually needs sealing.
The specifications behind the claim
GreenMore manufactures three tile formats. All three are produced in-house, and all three carry a 25-year linear power warranty.
Model
Pmax
Tile size (mm)
Weight
Junction box
Front load
GM-HW50BCCurved BC
50 W
720 × 500 × 32
6.5 kg
IP68, MC4
5400 Pa
GM-HW32LTriple-arch
32 W
700 × 500 × 33
6.5 kg
IP67, MC4
5400 Pa
GW30Flat tile
110 W
1060 × 650 × 35
8.9 kg
IP68, MC4
5400 Pa
Curved, triple-arch and flat formats share the same fixing logic but not the same output per piece.
The flat tile is the highest-output format per piece at 110 W, but the largest at 1060 × 650 mm. The curved BC tile is the smallest at 50 W, which is the price of matching a traditional curved profile. There is also a tile-strip system for long-span roofs, which carries 109 to 115 W per strip at 1817 × 420 mm and is specified per project rather than from a standard table.
Do not convert these numbers into watts per square metre of roof without allowing for overlap. Tiles lap over one another, and edges and ridges consume area that never gets covered. The useful figure for a given roof comes from a layout drawing, not from dividing one number by another.
Two cell technologies on the same roof
GreenMore builds the same tile shapes around two different cell technologies. They are not interchangeable, and the choice should follow the roof rather than the datasheet.
BC back-contact: the highest output per tile
Back-contact cells move all the electrical contacts to the rear of the cell. With no busbars on the front, the entire face collects light, and the surface reads as one uniform dark plane instead of a grid.
On the GM-HW50BC this delivers 24.1% module efficiency, the highest figure in the range. The 42 W and 37 W variants of the same tile come in at 23.9%. There are two practical consequences beyond the headline number: less shading loss when one part of the roof is partially covered, and better behaviour in heat, which matters in Gulf and southern Mediterranean markets where roof surface temperatures climb well above ambient.
CIGS thin-film: flexibility and weak light
The thin-film route uses a CIGS absorber on a flexible substrate, at roughly 100 to 105 W per square metre and 32 W per tile. Two things make it worth the lower power density: the substrate bends, so the tile follows a three-curve roof profile naturally instead of approximating it, and the material holds output better under overcast skies and at high angles of incidence.
If you are evaluating thin-film tiles, ask about the front encapsulation by name. ETFE front sheets have a documented history of delamination in hot and humid service, and the failure is slow enough that it often appears after the installation warranty has expired. We wrote up the mechanism and how to test for it in this analysis of ETFE peeling on three-curve tiles.
Which one fits which roof
BC back-contact
CIGS thin-film
Module efficiency
Up to 24.1%
About 100 to 105 W/m²
Power per tile
37, 42 or 50 W
32 W
Appearance
Uniform dark, no front busbars
Ultra-uniform, no grid lines
Weak light
Good
Better
Geometry
Rigid glass
Flexible substrate follows curves
Best for
Maximum output on a defined roof plane
Complex and strongly curved roof geometry
A practical rule: if the roof is a clean plane and the goal is the highest annual yield, take BC. If the roof is genuinely curved, or the building's character depends on that curve, thin-film is the only route that does not compromise the shape. GreenMore supplies both, which is the reason we can say that without steering you. The technology comparison in this overview of three-curve tile technologies goes deeper into the trade-offs, and the reason TOPCon never appears on a curved tile is a separate question of cell geometry.
What a seamless roof costs over its life
A solar tile roof costs more per square metre than plain roof tiles. It is also more expensive than a cheap panel array on a sound existing roof. Both statements are true and neither is the whole picture.
The comparison that matters is against the combined cost of a new roof plus a separate solar installation, because that is the alternative on a new build or a full re-roof. Two systems mean two mobilisations, two sets of scaffolding, two trades on site at different times, and two warranties that expire on different schedules. One integrated system means the roofer and the electrician work the same surface in the same visit.
There is a second saving that shows up years later. When a roof under a rack-mounted array reaches the end of its life, the array has to come off before the roof can be replaced, and the racking and flashing have to be redone afterwards. On an integrated roof there is nothing to remove, because the tiles are the roof. The two components reach end of life together, which is the whole design intent behind pairing a 25-year power warranty with a roof covering rated for the same horizon.
What we will not do is quote a payback period. It depends on your electricity tariff, your irradiance, your roof area, your subsidy regime and how much of the roof you cover. Anyone who gives you a single number before seeing those inputs is guessing.
Where seamless tiles work, and where they do not
Good fit
New builds and full re-roofs are the natural case. If the roof is coming off anyway, the marginal cost of going solar in the same operation is the lowest it will ever be. Pitched roofs on villas, hotels, cultural buildings and protected-street properties are where the aesthetic return is highest. Large-format flat tiles suit modern architecture and larger roof planes; curved and triple-arch profiles suit Mediterranean and Middle Eastern vernacular. The full tile range covers all of them.
Poor fit
Three situations where we tell buyers to look elsewhere. A flat or low-slope roof with a sound membrane is better served by a ballasted or adhered array, because there is no tile geometry to integrate with. A roof structure that cannot carry the additional dead load needs an engineer before it needs a product, and 6.5 kg per tile adds up quickly across a large area. And a building where only one slope is being redone, with no plan to touch the rest, will end up with two different roof surfaces that will never quite match.
The honest summary: this is a roofing decision that produces electricity, not a solar decision that happens to look better.
Adding storage to a solar tile roof
A tile roof on its own exports everything it makes during the day. Add a hybrid inverter and a battery, and the same roof starts covering evening load and grid outages.
Sizing follows the load, not the roof. A 10 kWh battery covers a typical household's critical circuits overnight; a 20 kWh pack starts to look reasonable once heating, cooling or an EV enters the picture. The roof's job is to refill it, and on a well-oriented tile roof in a sunny climate that happens most days outside winter. We go through the interaction between tile output and battery capacity in this guide to pairing tiles with storage.
One point that gets missed in planning: the roof and the battery have different lifetimes. A tile roof is designed to outlast one battery replacement, so the inverter and battery should be specified with that in mind, and mounted somewhere accessible rather than tucked into the roof assembly.
Six questions to ask any solar tile supplier
The market has filled up with suppliers who resell tiles made by someone else. That is not automatically a problem, but it changes what you can expect when something goes wrong in year eight. These are the questions that separate the two.
1. Do you manufacture the tile, or buy it? Ask for the factory, not the catalogue. GreenMore has been building BIPV products since 2017 and manufactures tiles, photovoltaic bricks and photovoltaic curtain walls in-house.
2. Which certifications apply, and to what? IEC 61215 covers design qualification and IEC 61730 covers safety qualification, and both are module-level standards. EN 14782 covers self-supporting roofing elements, which is the standard that matters for the roof function rather than the electrical function. Ask for the certificates, and check that the model on the certificate is the model you are buying. We explain what each one actually tests in this article on EN 14782 and IEC 61215.
3. What is the IP rating on, exactly? A supplier who says "IP68 tile" is either simplifying or does not know. The rating applies to the junction box and connectors. Anything above IP65 is fine for a roof; what matters is that the box is correctly potted and the connectors are the MC4 type rather than a proprietary clip.
4. Double glass, or glass and backsheet? On a roof, glass-to-glass. A polymer backsheet on a surface that reaches 70 °C in summer is the weakest link in the assembly.
5. How long is the tile warrantied, separately from the power output? These are two different promises. A 25-year linear power warranty says nothing about whether the tile still keeps water out in year 20. GreenMore tiles carry a 25-year linear power warranty; the triple-arch tile carries a 30-year tile warranty on top of it.
6. Can I see a roof that has been up for a few years? A completed project tells you more than a datasheet. The Netanya project in Israel used 407 tiles across a single integrated roof, and the installation sequence is documented in this installation walkthrough.
Frequently asked questions
Do solar tiles replace regular roof tiles?
Yes. They are the primary roof covering, not an addition to it. The covered area needs no clay or concrete tiles underneath, and the interlocking profile provides the weather barrier. What stays underneath is the roof structure and battens, exactly as it would be for a conventional tiled roof.
How efficient are seamless solar tiles?
The BC curved tile reaches 24.1% module efficiency at 50 W, which is at the top of what crystalline silicon delivers in a tile format. CIGS thin-film tiles run at roughly 100 to 105 W per square metre. A tile roof will always be slightly less productive per square metre than a large-format panel, because tile geometry and overlap consume area. The comparison that matters is against the alternative you can actually build on that roof.
Can solar tiles match a traditional roof style?
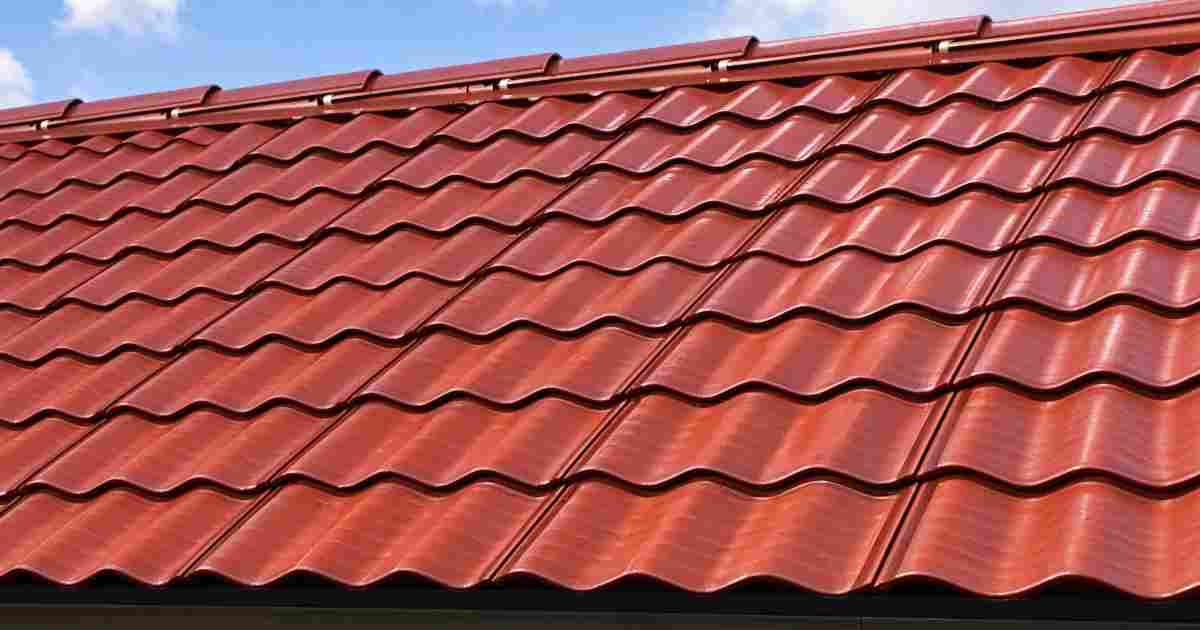
That is the point of them. Triple-arch profiles reproduce the shape of classic clay tiles, and the range is available in grey, green, red and black matte finishes. On a protected-street renovation the roof reads as a matching replacement rather than an intervention, which is usually the difference between approval and rejection.
What warranty comes with a solar tile roof?
A 25-year linear power warranty on output across the range, plus a 30-year tile warranty on the triple-arch profile. Both are backed by factory testing under IEC 61215 and IEC 61730, with CE and EN 14782 conformity for the roofing function.
Can I install solar tiles on just part of a roof?
Yes, and it is a sensible way to control cost. Cover the sun-facing slopes and leave the rest as conventional tiles, provided the two coverings are profiled and coloured to match. What we would avoid is a partial replacement on one slope that leaves the building with two visibly different roof surfaces.
How do they hold up over twenty-five years?
The double-glass assembly removes the backsheet, which is the component that usually fails first on a conventional module. The remaining risks are the junction box seals and the interlocking joints, both of which are addressed by the IP rating and the tile geometry rather than by a coating. Field data from ageing and weathering tests is summarised in this long-term weathering review.
L
Luke
Product Manager, Solar Roof Tiles
Works with installers and project developers on BIPV roof specifications, from tile layout drawings through to commissioning.
Updated on November 16, 2026





 Network Supported


